Apple did a great job with Bootcamp, a tool that allows us to run Windows easily on Apple hardware. However, if you attempt to run Apple hardware or Apple peripherals on Windows systems, you usually end up a little puzzle to solve. Bootcamp was made for Macs, not PCs. In this post I’ll address the keyboard because I found it to be the most frequent issue. Not that everybody wants to hook an Apple keyboard to some vanilla PC but there’s one frequent situation where this is exactly what we are doing: virtualisation on a Mac. If you do not want to partition your Mac, having to reboot to switch between Windows and OSX, virtualisation is the way to go. However, in such case, you’ll usually install the drivers from your favourite hypervisor not the drivers from Bootcamp. It makes sense since with virtualisation, you’re simulating a vanilla PC, not Windows running on a Mac. Also, when you try to install Bootcamp on a Windows PC, it usually doesn’t end well. Installing the hypervisor drivers optimizes your Windows virtual machine but you’re left with a dysfunctional keyboard.
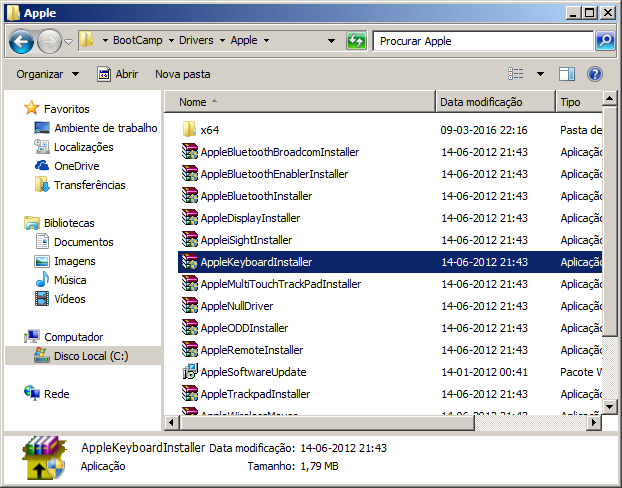
In the case where installing Bootcamp fails, there’s a simple two step process you can apply to solve the issue. The first step is to install the Apple keyboard driver bundled in the Bootcamp package. If you’re installing the Apple Wireless Keyboard (new Magic Keyboard doesn’t work), the very first thing is to pair the keyboard with Windows using the standard procedure. You need to download Bootcamp from Apple’s web site. You may need to try several versions of the driver, depending on your version of Windows. If you’re running a 32 bit version of Windows, you’ll probably have to go back to version 4 of Bootcamp to find a working driver. You need this driver for the keyboard to work correctly regarding key mapping and the Fn key. Without this driver you won’t be able to do Ctrl-Alt-Del. In Apple keyboard, this key sequence would be Fn-Ctrl-Alt-Backspace. The driver can be found in the folder Bootcamp\Drivers\Apple, like it’s shown in the picture bellow (Portuguese version of Windows 7):
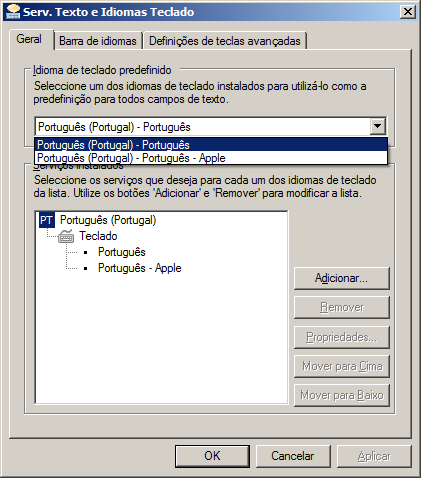
After the driver is installed, you should go to the Control Panel and select Regional Settings, Region and Language or whatever Microsoft decides to call it. Then navigate to the Keyboard and Languages tab and click Change Keyboards. You should then try to add the Apple keyboard from the available list of keyboards (like you can see on the picture below, again Portuguese version of Windows 7). If you can’t find your new keyboard layout, don’t panic. It has been known to happen… In this case you may try to re-install everything or try a different version of the driver but personally I prefer to install a new keyboard map and kill this issue. That’s the second step of the process described here.
For the new keyboard layout, Microsoft offers a tool to develop whatever layout you need, the Microsoft Keyboard Layout Creator. As you might expect, this tool has it’s own quirks so you should install it following this simple requirement: install into a root folder or a pathname without any space characters. This tool will give you a simple, intuitive interface like you can see on the picture below.
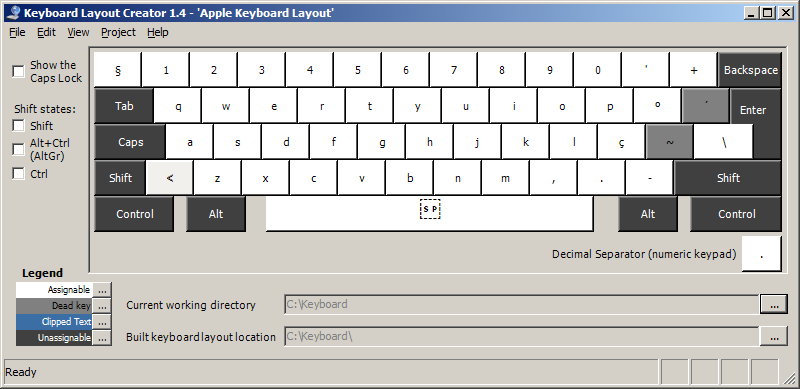
Now you just remap the keyboard as you need and the generate the installation files (DLLs) required to add a new keyboard for your Windows instance. Here we’re mapping the Portuguese version of the Apple Keyboard. On the next picture you can see the files generated for this project.
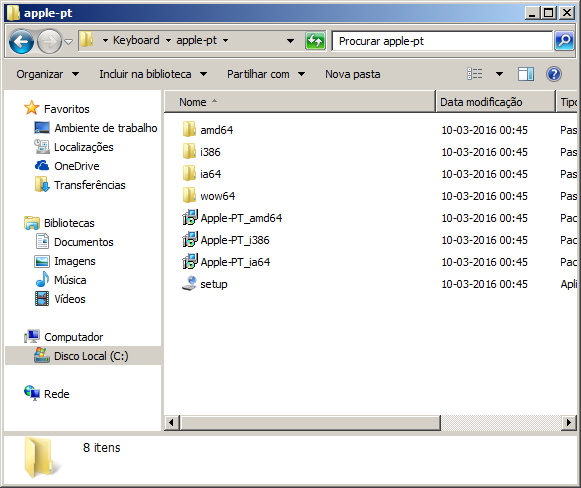
If you’re interested in the these files, for the Portuguese keyboard, you can download them here and just install them. I also included the source file for MKLC here. After the new layout is installed, you should go back to Control Panel and verify that you now have the correct layout for the Apple keyboard available in the keyboard settings.