Microsoft Deployment Toolkit (2013 or SCCM) has a very nice feature that allows you to deploy a task sequence to a flash drive or a CD and end up with a portable storage with all your deployment options. However, MDT does not generate a dual boot solution. The method described here, it’s not a general solution but has proven to work relatively well. In theory, for legacy BIOS you should have your drive with a MBR partition table with an active partition, a master boot record and boot sector on your active partition. For UEFI, you should have a GPT (over 2GB) formatted disk with a FAT32 partition with the required files for UEFI boot. Having both schemes on the same disk is possible but not very practical.
It turns out that a lot of UEFI firmware does not care how the disk is formatted. It does require a FAT32 partition with the required files, but the disk can be formatted with MBR or GPT. This allows the creation of a MBR dual partition disk, one FAT32 partition to hold the boot files and a NTFS partition to hold your task sequence files. Because this was to easy, Microsoft decided to complicate things for us by allowing Windows to mount only the first partition of a flash drive. This becomes an issue when you connect your flash drive to your MDT server for a media update. Also, it doesn’t allow you to create a multiple partition disk like this, even with diskpart. Fortunately, Microsoft changed this in its latest version of Windows 10, making it a mandatory tool for this project.
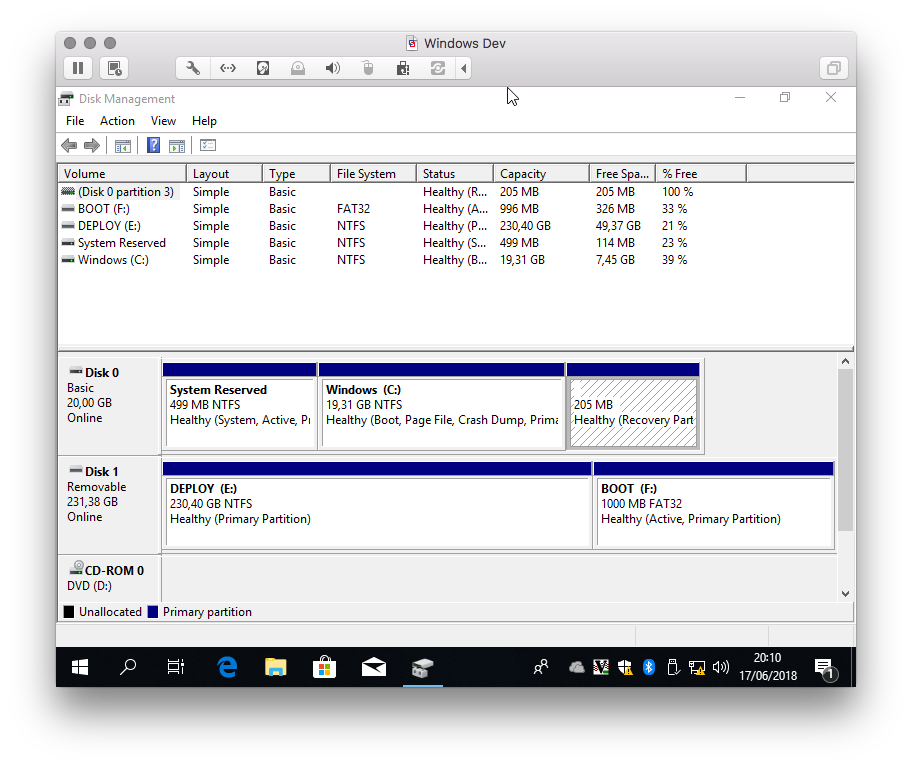
As you can see in the screen capture, the NTFS partition will be the first in the partition table and then we add the second FAT32 partition at the end and mark it as the active partition (if it fails, just use Linux to do the partitioning). This way, when you connect the flash drive to a Windows system that only mounts the first partition, you’ll have access to the NTFS partition that will be used to sync our MDT repository. Once the partitioning is finished, you should create the boot sectors required for booting with legacy BIOS with the following command:
bootsect /nt60 F: /mbr
In this case, F: (BOOT volume) is given since is the volume in this example that will contain the boot files for the task sequence as it shown in the photo. Once this is accomplished we move to the Windows server where we have MDT installed.
It’s time to generate the new media in MDT deployment workbench. In the new media wizard add the DEPLOY volume in the flash drive, give it a dedicated folder (if you try to use root and there are other files already, MDT complaines the folder is not empty…) and do not create an ISO image, you will not need it. Besides, creating an ISO will take for ever when you re-sync the repository and it will double the required space available on your target volume. For this example, the F:\MDT is used to sync the repository (note that F: in the Windows server is the DEPLOY volume).
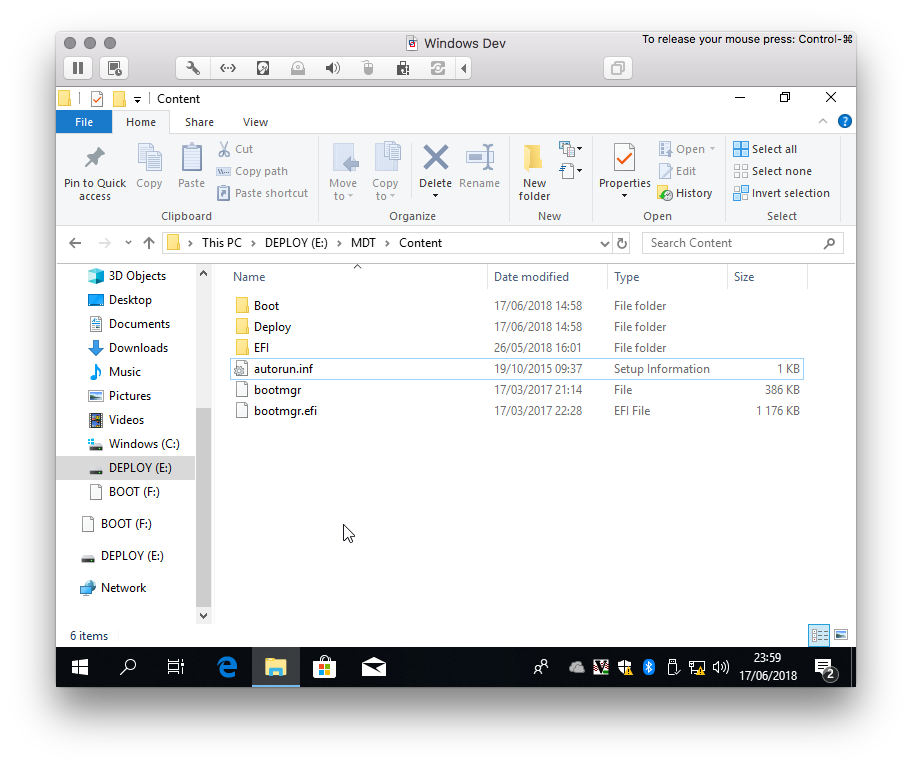
Once MDT finishes copying your deployment repository, it’s time to go back to your Windows 10 instance. You need to access the BOOT volume and copy some files from the DEPLOY volume. From the Content folder you need to copy the following to the BOOT volume:
- bootmgr
- bootmgr.efi
- autorun.inf
- EFI
- Boot
- Deploy\Boot
 In the DEPLOY volume, you also need to move the Deploy folder to the root. Also, you need to move it back whenever you want to update the flash drive with new content from the MDT server, as well as update the contents in the BOOT volume. A truly boring process that can be eliminated with the aid of two scripts. One to be executed before the MDT media update and the second script, to be executed after the update. The first script just moves the Deploy folder to its original place (run the scripts as administrator on the root of the DEPLOY volume):
:: Before MDT media update
setlocal enableextensions enabledelayedexpansion
cd /d "%~dp0"

move Deploy MDT\Content\
pause
:: After MDT media update
setlocal enableextensions enabledelayedexpansion
cd /d "%~dp0"

if exist %TEMP%\vol_str.txt del %TEMP%\vol_str.txt

wmic logicaldisk get deviceid,volumename | findstr DEPLOY >%TEMP%\vol_str.txt
set /p DEPLOY_VOL=<"%TEMP%\vol_str.txt"
if not "%DEPLOY_VOL%"=="" set DEPLOY_VOL=%DEPLOY_VOL:~0,2%

wmic logicaldisk get deviceid,volumename | findstr BOOT >%TEMP%\vol_str.txt
set /p BOOT_VOL=<"%TEMP%\vol_str.txt"
if not "%BOOT_VOL%"=="" set BOOT_VOL=%BOOT_VOL:~0,2%

del %TEMP%\vol_str.txt

if "%DEPLOY_VOL%"=="" (
    echo DEPLOY volume missing
    exit /b 1
)

if "%BOOT_VOL%"=="" (
   echo BOOT volume missing
   exit /b 1
)

if not exist %DEPLOY_VOL%\MDT\Content\Deploy if not exist %DEPLOY_VOL%\Deploy (
    echo Deploy folder missing
    exit /b 1
)
if exist %DEPLOY_VOL%\MDT\Content\Deploy (
    %DEPLOY_VOL%
    cd \
    move MDT\Content\Deploy \
)

:: update files in BOOT volume
robocopy %DEPLOY_VOL%\MDT\Content\ %BOOT_VOL%\ /Z /MIR /FFT /XD .Spotlight-VC100 /XD Deploy
if not exist %BOOT_VOL%\Deploy mkdir %BOOT_VOL%\Deploy
if not exist %BOOT_VOL%\Deploy\Boot mkdir %BOOT_VOL%\Deploy\Boot
robocopy %DEPLOY_VOL%\Deploy\Boot %BOOT_VOL%\Deploy\Boot /Z /MIR /FFT

:END
pause
exit /b 0